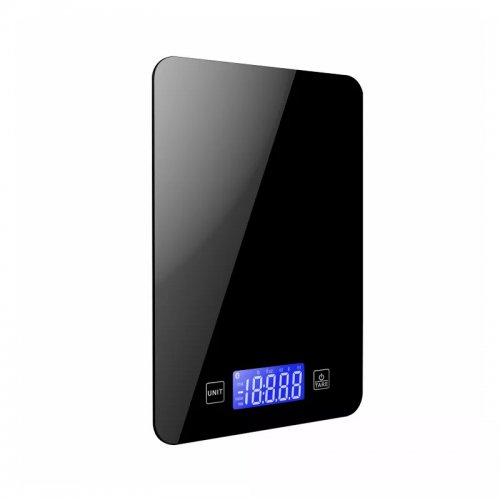
Weighing accuracy is not a feature you switch on—it is a discipline you build into every measurement. Whether you are formulating pharmaceuticals, compounding chemicals, or preparing analytical standards, the difference between a trustworthy result and a false one often comes down to how carefully you manage the weighing process. This guide walks you through the operational steps, environmental controls, and routine habits that turn a balance from a simple tool into a precision instrument.
Before touching the balance, define your accuracy target. Accuracy is the closeness of a measured weight to the true value, and it is distinct from precision (repeatability). For practical use, you need three numbers:
Readability – the smallest increment the display shows (e.g., 0.1 mg). This is not accuracy.
Repeatability – the standard deviation of repeated weighings of the same mass. This limits your real accuracy.
Calibration tolerance – the maximum allowed deviation from a certified reference weight (e.g., ±0.2 mg for a 100 g class E2 weight).Action step: Check your balance’s specification sheet. Write down the repeatability value. Your measurement uncertainty will never be better than that number, regardless of readability.
Accuracy is destroyed by drafts, vibration, temperature gradients, and humidity. Do this before any weighing session:
Place the balance on a solid, vibration-isolated table. Avoid near doors, HVAC vents, or centrifuges.
Keep the balance away from direct sunlight and heat sources. Temperature changes cause drift in the load cell.
Use a draft shield for analytical balances (0.1 mg or finer). Close the doors during reading.
Allow the balance to warm up for at least 30 minutes after power-on. Modern balances need this for internal electronics to stabilize.
Check the level bubble. Adjust the feet until the bubble is centered. A tilted balance gives skewed results.Pro tip: Keep a hygrometer nearby. For high-accuracy work (0.01 mg readability), maintain relative humidity between 40% and 60%. Static electricity becomes a major error source below 30% RH.
Calibration is the only way to link your balance’s output to a known standard. Do not skip it, and do not do it randomly.
Internal calibration: If your balance has a motorized internal weight, run it daily before the first measurement. Many models allow you to set an auto-calibration at a fixed time (e.g., 8:00 AM) after warm-up.
External calibration: For balances without internal calibration, or when you need a higher traceability level, use certified calibration weights (class E2 or F1). Procedure:
1. Tare the empty pan.
2. Place the weight gently in the center of the pan. Do not drop it.
3. Wait for the reading to stabilize (the stability indicator appears).
4. Record the displayed value and compare it to the certified value.
5. If the difference exceeds the balance’s tolerance, perform the calibration function on the balance (enter calibration mode, follow prompts, then re-test).
Frequency: At minimum, calibrate once per day. For high-stakes work (e.g., preparing titration standards), calibrate before each series and re-check after the series.Warning: Never calibrate with a weight that is dirty, scratched, or handled without gloves. Oils from your skin change the mass by micrograms—enough to ruin a 0.1 mg calibration.
The way you place the sample matters more than you think. Follow this step-by-step procedure for every measurement:
Use a clean, dry weighing boat, dish, or paper. For hygroscopic samples, use a stoppered or capped vessel.
Place the empty container on the pan. Wait for the stability indicator. Press the tare (zero) button.
Do not tare while the draft shield is open. Close it, wait 2–3 seconds, then tare.
Open the draft shield, add the sample using a clean spatula. Add in small increments. For powders, use a scoop or spoon, not pouring.
Critical rule: If you overshoot, remove the excess and start over. Do not try to scoop out powder from the pan—this can contaminate the balance and create static.
Close the draft shield immediately. Wait for the stability indicator. Do not read the value while the display is still fluctuating.
Read the display only after the stability symbol (usually a small circle or “g” icon) remains steady for at least 3 seconds.
Record the value with the correct number of decimal places (e.g., 1.2345 g, not 1.23 g).
For critical measurements, take three consecutive readings, recalibrate between them, and use the average.
Remove the container. Use a brush or lint-free wipe to remove any spilled powder.
Leave the pan empty and the draft shield closed.Two silent killers of weighing accuracy are static charge and moisture uptake.
Static electricity: Powders (especially fine ones) and plastic containers hold charge. This causes erratic readings that drift upward or downward. Fixes:
Use metal or glass containers instead of plastic when possible.
Use an ionizing blower (antistatic gun) aimed at the container and sample for 2–3 seconds before weighing.
Wipe the outside of plastic containers with a damp (not wet) lint-free cloth to dissipate charge.
Increase humidity to 50–60% RH in the room—static drops sharply.
Hygroscopic samples: Materials like NaOH, CaCl₂, or many pharmaceutical APIs absorb water from air. Their weight increases continuously. To minimize error:
Weigh in a capped vial. Tare the vial with its cap, then quickly add the sample, cap it, and weigh.
Work fast. Do not leave the sample exposed while you adjust other parameters.
Alternatively, use a weighing funnel with a narrow neck to reduce air contact.Even experienced users make these errors. Check yourself against this list:
Weighing a warm sample. Always let samples cool to room temperature in a desiccator. Warm samples create convection currents inside the draft shield, causing upward drift.
Weighing a cold sample. Condensation adds water mass. Wait for thermal equilibrium.
Touching the pan or container with bare hands. Fingerprints add mass and oils. Use tweezers or gloves.
Reading too early. The balance needs 5–10 seconds after closing the shield to stabilize. Patience is a tool.
Using a balance that is too large for the job. If you need 0.1 mg accuracy, do not use a balance with 0.01 g readability. Match the balance to the required uncertainty.
Forgetting to check the level bubble before each session. Vibrations from moving the balance can knock it off level.Accuracy is a habit, not a one-time setup. Implement these schedules:
Daily (before first use):
Check level bubble.
Warm up 30 minutes.
Run internal calibration.
Perform a check with a single certified weight (e.g., 100 g). Record the result in a logbook.
If the check fails, recalibrate externally.Weekly:
Clean the pan and draft shield with a lint-free cloth and mild ethanol (not acetone—it can damage coatings).
Check for powder residue under the pan. Remove with a soft brush.
Verify that the draft shield doors slide smoothly. Sticky doors cause air currents.Monthly:
Perform a full external calibration with two weights (e.g., 10 g and 100 g) covering your typical range.
Test linearity by weighing a weight at 10%, 50%, and 100% of the balance capacity.
Inspect the power cable and grounding. A poorly grounded balance picks up electrical noise.Accuracy without documentation is not traceable. For regulated industries (GMP, ISO 17025), keep a weighing log with:
Date and time
Operator name
Balance ID and calibration status
Ambient temperature and humidity
The certified weight values used for verification
The measured values and the difference
Any corrective action taken (e.g., recalibration)This log becomes your evidence that weighing accuracy was maintained—and it tells you when drift starts to occur before it becomes a critical error.
Before every critical weighing, run through this mental list:
1. Is the balance level?
2. Has it warmed up?
3. Is calibration current?
4. Is the draft shield closed and clean?
5. Is the container dry, at room temperature, and static-free?
6. Am I using gloves and tweezers?
7. Am I waiting for the stability indicator?
8. Am I recording the full decimal precision?
If you answer